Install VMware Workstation on Arch-Based Systems

VMware Workstation is a powerful virtualization tool that allows you to run multiple operating systems simultaneously on a single machine. Here’s a step-by-step guide to installing VMware Workstation on Arch-based systems like Garuda Linux using AUR or Chaotic AUR.
Steps to Install VMware Workstation
1.Install yay
Open your terminal and execute the following commands:
sudo pacman -S --needed git base-devel
git clone https://aur.archlinux.org/yay.git
cd yay
makepkg -si
2. Install VMware Workstation
Once you install yay, install the workstation using the command:
yay vmware-workstation

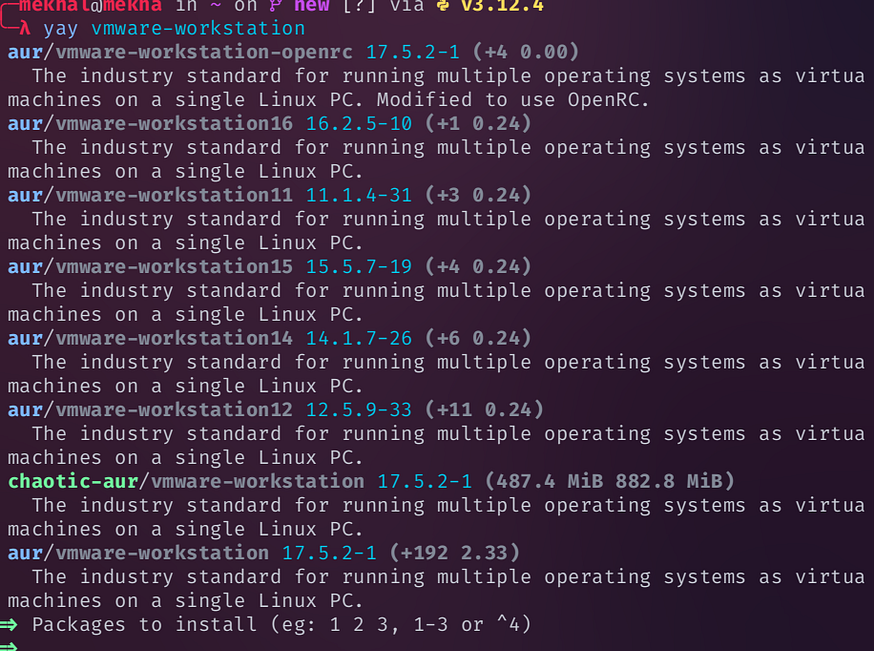
During the installation process, you might be prompted to choose a package to install. You’ll see something like this:

You can see the version being downloaded. Check for the number in the line aur/vmware-workstation 17.5.2-1 (+192 2.33). For me, it is 1, so at the prompt, give 1 to proceed with the installation.
Next, you might see a prompt like this:

This prompt is asking whether you want to cleanBuild certain packages. Here are the options explained:
[N]one: Do not clean build any packages.[A]ll: Clean build all packages.[Ab]ort: Abort the installation.[I]nstalled: Clean build only the installed packages.[No]tInstalled: Clean build only the packages that are not installed.
For a fresh installation or to ensure everything is rebuilt properly, you should choose A (all). This will delete the cached build files and rebuild them from scratch, which can help avoid potential issues with outdated or corrupted build files. Enter A at the prompt to proceed.

The next prompt would be :
This prompt is asking whether you want to view the differences between the package in the AUR and your local version. Here are the options explained:
[N]one: Do not show any diffs.[A]ll: Show all diffs.[Ab]ort: Abort the installation.[I]nstalled: Show diffs for installed packages.[No]tInstalled: Show diffs for packages that are not installed.
If you’re not interested in viewing the differences between the AUR package and your local system, you should choose [N]one. This option skips displaying any diffs and proceeds with the installation without interruption. Enter N at the prompt to proceed without showing diffs.
Next you may be prompted for your sudo password and asked to confirm installation steps .Type y to confirm and proceed with the installation.
3. Launch VMware Workstation
You can now launch VMware Workstation from your application menu or by running:
vmware
Conclusion
That’s it! You have successfully installed VMware Workstation on your Arch-based system. Enjoy virtualizing various operating systems seamlessly with VMware Workstation.